- Published on
Deploy WordPress using github on Azure
Deploy WordPress using github on Azure, If you have no idea or very little knowledge on how to even get started with azure on WordPress and link those source code to github then this article might be right for you.
What i expect you already know:
1. Github commands or github workflow
2. Have paid azure account
In Azure, WordPress setup is alot easier than we think. This article will guide you on setting up basic instance of WordPress using free mercury DB and after WordPress setup we will finally configure on how to deploy live directly from github.
Lets Get Started
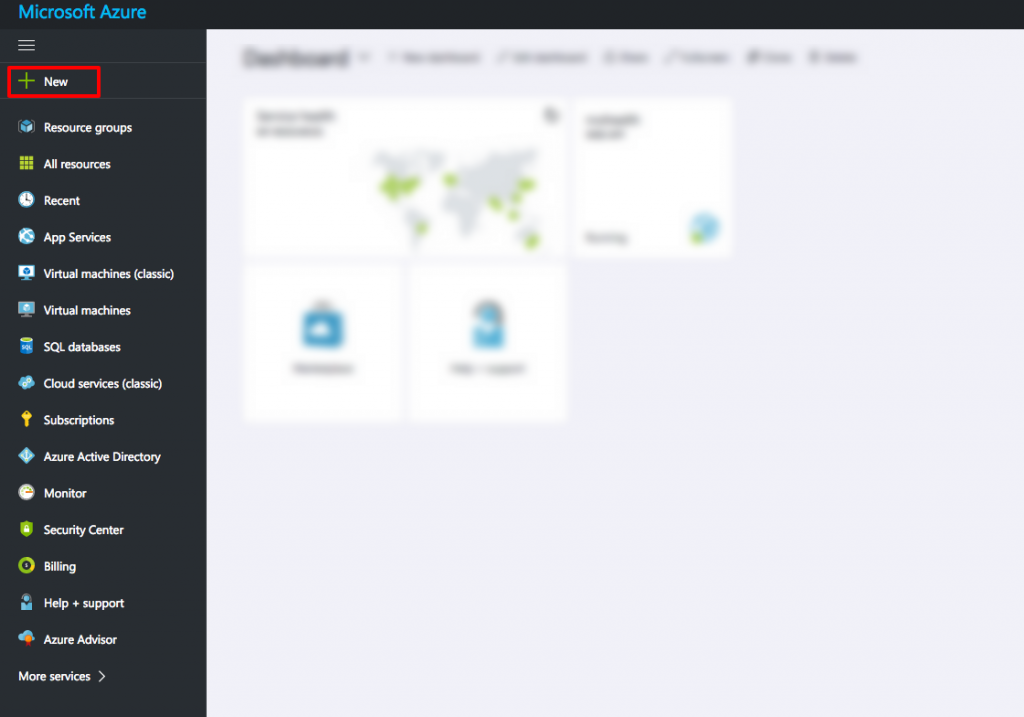
Login to your azure portal through portal.azure.com and you should see the following screen.

Goto New > Web + Mobile > See All and Search for WordPress where publisher is also WordPress.. There are many other options for installing WordPress as well by different vendors but for this we will stick to the original. Create WordPress.
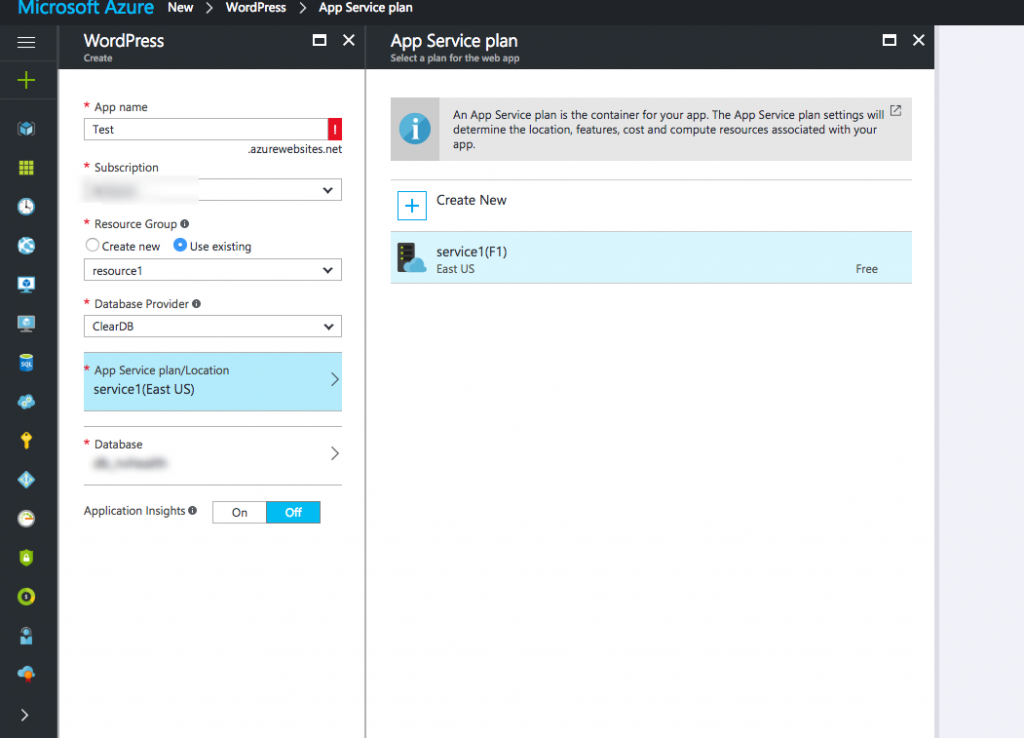
After create you get the following screen where you will create app name, assign database, subscription plan. Assign resource and a service plan as well.

Create an app, choose your subscription, create a resource name or choose existing one. For App service plan you can choose the free shared one and for database as well. Mercury pricing tier.
After you have all these settings verified, press create. Azure will now create instance of WordPress. It might take some time to configure. After your setup is complete, you can now run WordPress install. After your setup is complete you should be able to see following type of screen.

You should be able to view your site by clicking the URL like in the screenshot above highlighted in RED or you can directly view by clicking on browse. When you launch your URL i.e yoursitename.azurewebsites.net you should be greeted with WordPress install. Setup your WordPress and we will jump into github deployment in next section.
Deploy using Github
For deploying in WordPress i found a bit of change in normal process.
- Create a Github Repo.
- If this is your first time setting up a repository in Azure, you need to create login credentials for it. You will use them to log into the Azure repository and push changes from you git repository From your app’s blade, click Settings > Deployment credentials, then configure your deployment username and password. When you’re done, click Save.
- Login to your FTP and get all files on your local from live. Most importantly don’t miss out wp-config.php file. Create a .gitignore file like below.
- After files from live have been downloaded to local git init to that folder and push them to live.
#####################
# WordPress Ignores
# ###################
wp-config.php
wp-content/uploads
When we push to github from our local we will just be ignoring the uploads and wp-config file. Rest of the files will be pushed to github and from there the merge process will take place with azure automatically.
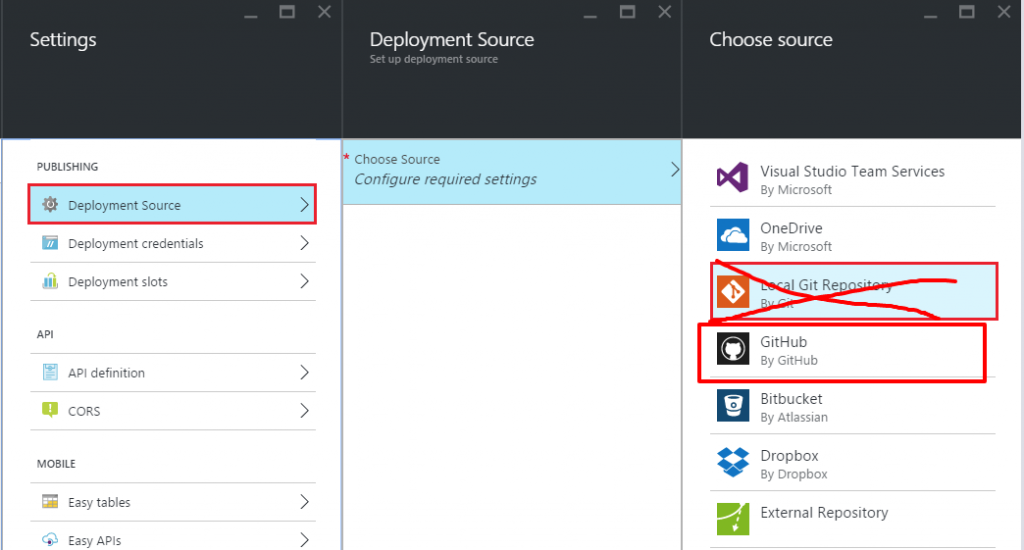
- Now, in your App Service app’s blade, click Settings > Deployment options. Click Choose source, then click Github, and then click OK. Configure your github account here.

- Connect your github Account with created repo that you just pushed and let it automatically sync at first.
- Since, we added wp-config to ignore list your site wont work. So, manually upload the wp-config from the saved copy to your live. After this you will never need to do this again.
Now, whatever changes you do in your local you push it to live and it gets deployed into azure. Pretty simple eh ? but there are more types of deployment options as well in azure. Staging, production and Development but that is for you to figure out yourself.
Also, do know that my view towards WordPress on Azure is not so positive as there are alot of other fast hosts that gets the job done way cheaper and reliably. But if you do have audit based sites then i think this might do it pretty well.